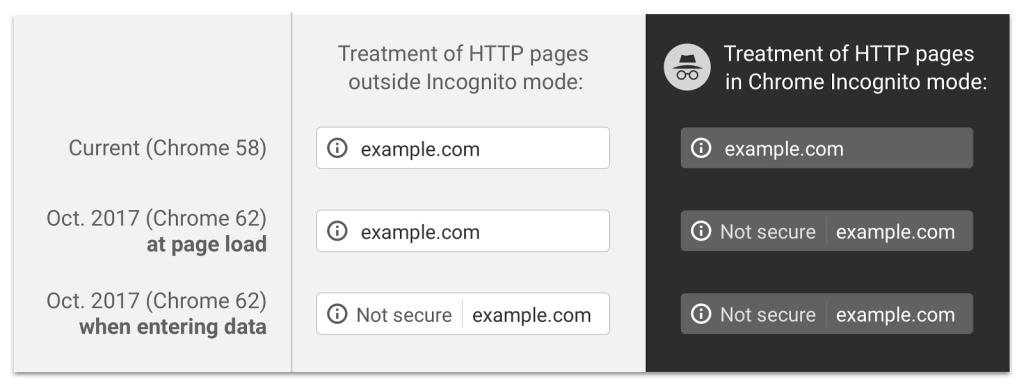
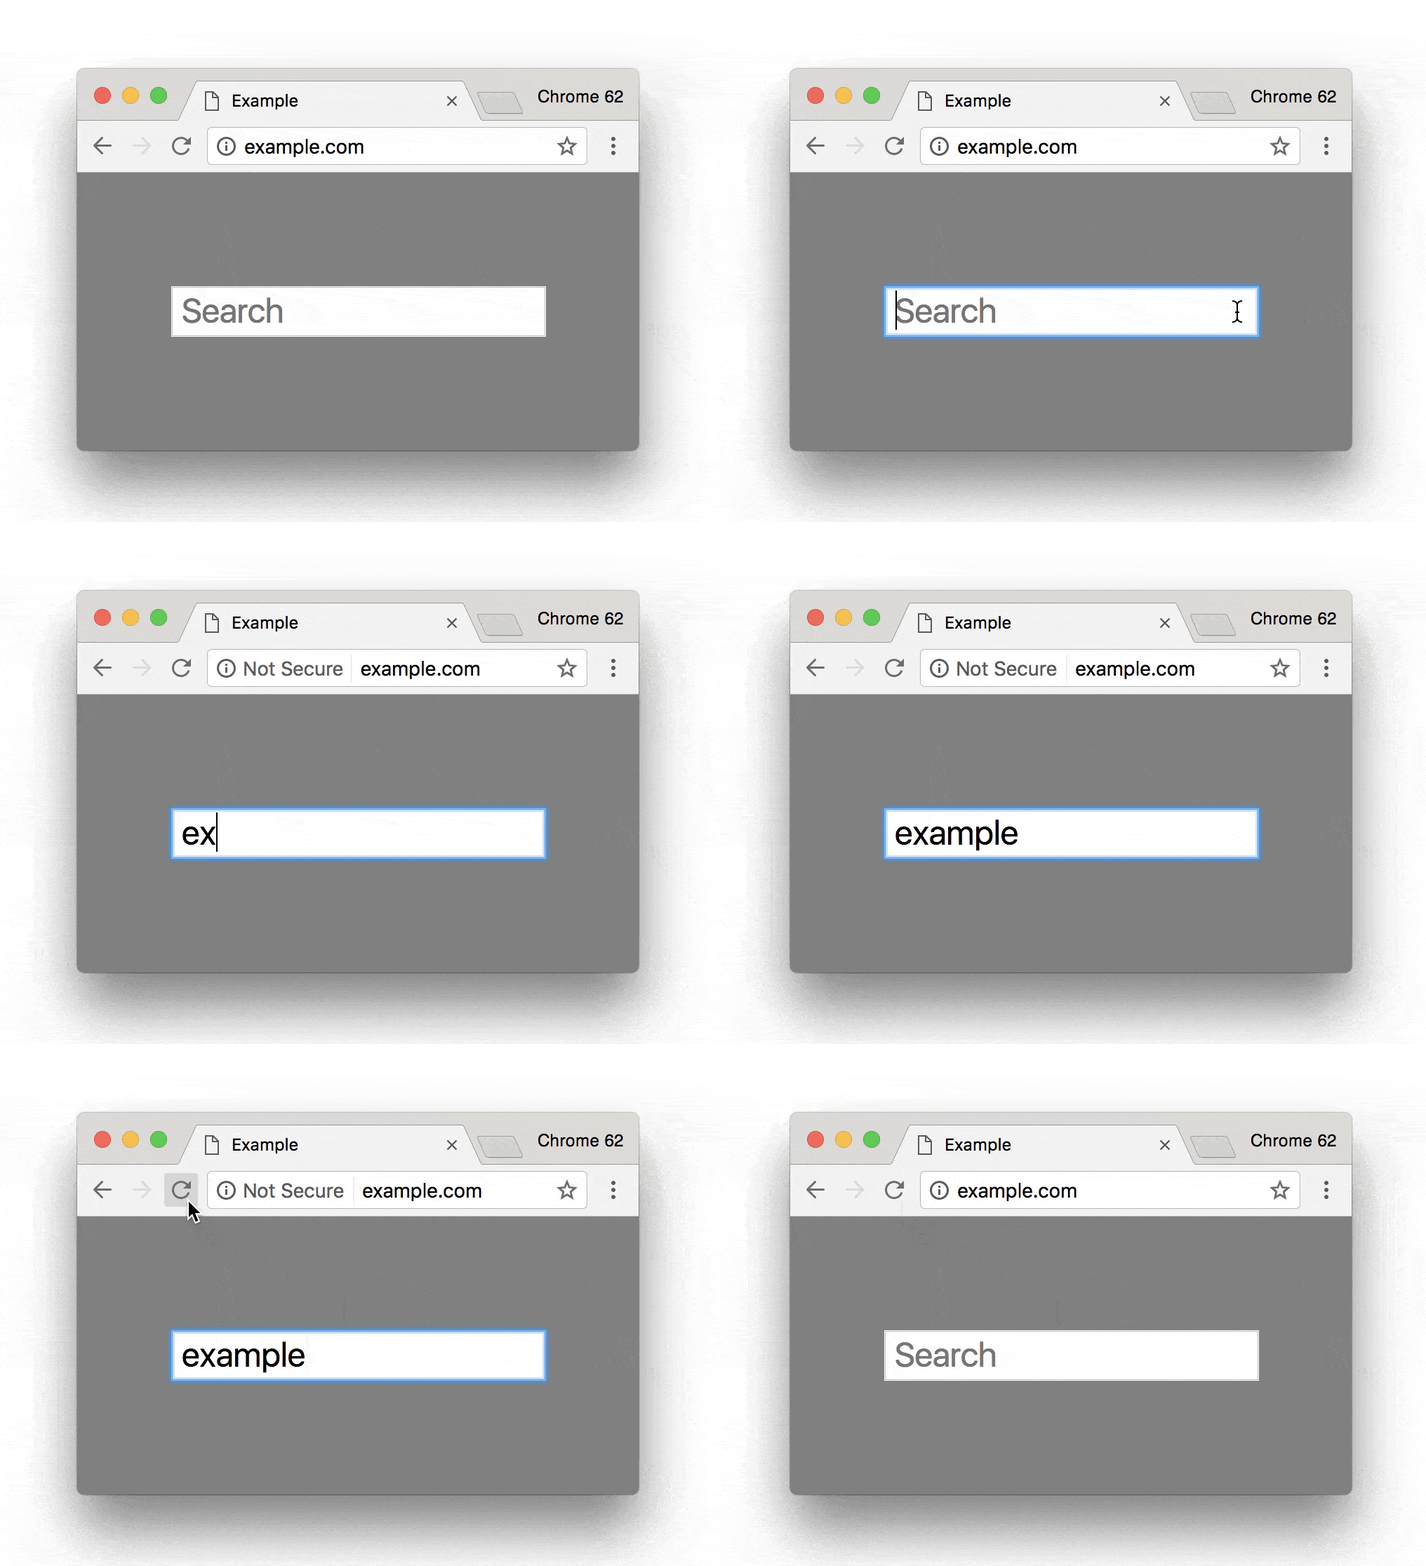
We’ve been talking about Google’s push towards HTTPS quite a bit this year. Now, we’re seeing e-mails being sent from Google to website owners warning them that Chrome will begin showing security warnings to visitors about their site.

What is the warning about?
Chrome 62 is being released in October 2017 will and show a NOT SECURE warning when users enter text in a form on an HTTP page, and for all HTTP pages in Incognito mode. If your site contains any text or e-mail input fields a NOT SECURE warning will appear in the URL bar when the input is being made. Here are a few examples of forms that use text and/or e-mail input fields:
- Contact forms
- Newsletter sign-ups
- Log-in fields*
- Search boxes
- E-mail confirmation boxes
- Store, product, shopping cart and checkout pages*

What you need to do
Google has been sending warning e-mails to site owners who have Search Console accounts. This is a very limited group compared to the internet at large–so even if you have not received an e-mail does not mean that your site won’t be flagged.
If your site is not running on HTTPS right now, you should begin steps to make it happen. There are easy and cheap (sometimes free) ways to implement HTTPS on your site.
STEP 1
Check with your web host to see if they have AutoSSL available. Providers like Let’s Encrypt provide robust, secure SSL certificates that can be added to your domain and will not expire. If you’ve purchased and installed SSL certificates in the past, you’ll understand how awesome this is. If your web host offers AutoSSL, have them enable it.
Switch to a web host that offers AutoSSL. Like us, for example. Cinch has been actively moving our customers to HTTPS with Let’s Encrypt for months already. You can join them by contacting support@cinchws.com and asking about hosting plans.
Purchase and install a traditional SSL certificate. For some domains, this may be the only solution. It’ll cost you some money and the installation process is not really DIY.
STEP 2
Update Settings > General in WP dashboard. Change both your WordPress Address (URL) and Site Address (URL) to reflect HTTPS. i.e. https://YourDomainName.comRedirect HTTP traffic to use HTTPS by editing your site’s .htaccess file. For most web servers, you’ll want to add this code to your .htaccess file:RewriteEngine On
RewriteCond %{HTTP_HOST} ^YourDomainName.com
RewriteCond %{SERVER_PORT} 80
RewriteRule ^(.*)$ https://YourDomainName.com/$1
STEP 3
Fix mixed-content warnings or any other issue that may be preventing your site from being fully secure. Your URL bar should show you a green padlock in Chrome. If not, something on your site is not secure and needs to be fixed–typically it’s an image or resource that your site uses. Start by querying your database for instances of http://YourDomainName.com or http://www.YourDomainName.com, then do a search and replace to change those instances to HTTPS. We like Better Search and Replace for this task.
We’re here to help. If you have any questions about HTTPS or your particular situation please start a chat with us or contact support@cinchws.com.
*Fields intended for passwords and credit card data are already being flagged with a warning in Chrome.
Note to Cinch Hosting Clients
Our servers are set up to provide free SSL Certificates. Give us a shout and we’ll get your site secured at no extra cost, and with no effort to you!
1 Comment
at